
All right people, here is a simple trick i learned in Photoshop to create a Planet of your own. Sit back, turn on your music, grab a drink or whatever you need and here we go.
First of create a new document in Photoshop. I created one that is 3500 x 3500 pixel. The reason of using such high pixel is so that u can get a fine and nice detailed texture on the planet surface. Now...leave that page, find a nice picture for your earth surface (you can use pictures of rocky ground or earth or any texture you like).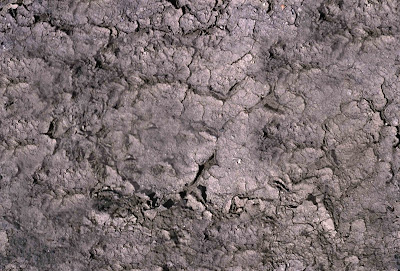
this is the texture that i chose. If your texture file is too small, try to patch it up on a new 3500x3500 document to patch the textures together.
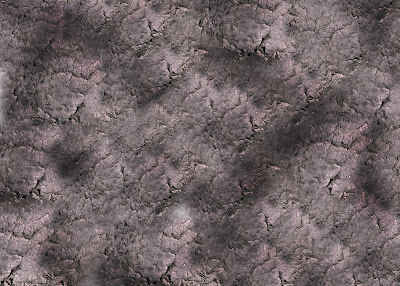 After some patching and color burns, this is what i got. Go to Edit and select Define Pattern
Name if after ''The Texture of Planet Awesomnus'' ....you can name it whatever you want. Lets just call mine Planet Awesomnus for now.
OK..Now go back to the new document file, select Elliptical Marque Tool, hold down shift key and drag a uniform circle across the screen. Create a new layer and name it 'planet ground'- select paint bucket tool - go up to the tool bar and change from FOREGROUND to PATTERN. Select the pattern that you created earlier and fill up the marque area.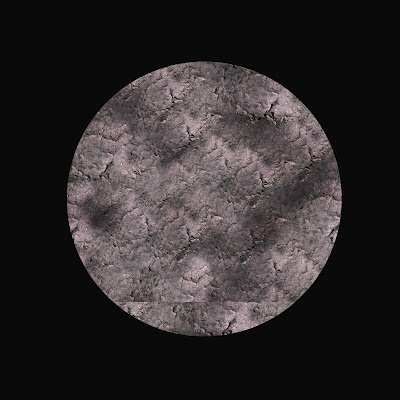
There you go.. This is what you will archieve. The image here seems flat so im going to add a filter to it. Go to Filter - Distort - Spherize it babeh! you will then get something as below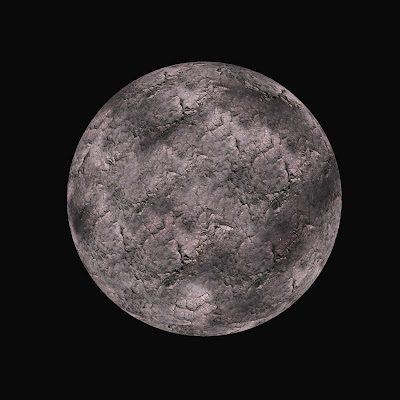
Notice the difference? Good..carry on..
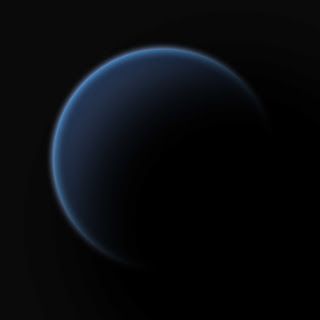
Next, we're gonna work on the atmosphere of the planet. use your magic wand to marque the Black colored area, right click and select inverse. Turn off the earth layer and create a new one. Name the new layer as Atmosphere. Fill up the marque area with the color you want for your atmosphere. For this tutorial im going for a blue atmosphere for my planet. Below are the settings.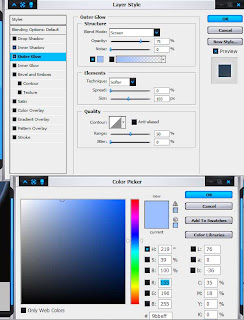
 You should be able to get something like this...
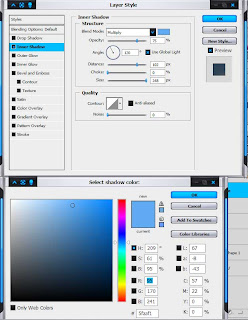
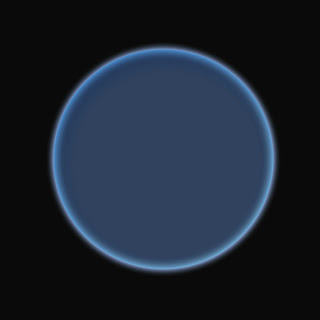 Now...create a new layer and name it shadow. Place the layer on top of atmosphere. Now, again with the magic wand technique but this time set the Tolerance to 50...marque the circular area and fill it up with black color. You will then get something like this.
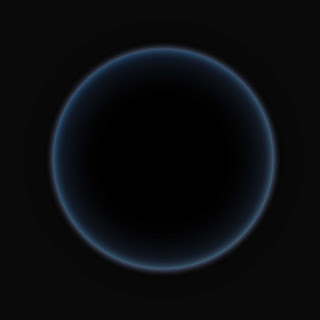
Alright, now you have a nice eclipse but thats not what you want rite? Select your shadows layer and move it lower to your bottom right if the sun direction is from the opposite angle. try to resize it holding down the shift key until u get the shadows coverage you want. Here is mine below.
 Last but not least...turn on your Planet Ground and place it in between your Atmosphere and Shadows layer. Then set it to screen. Wahlah..you're almost there!
 well, you can add in some of the details such as clouds or touch up the shadow layers. Play around with it and spend some time testing with multiple layers to create different atmosphere on the planet. i added in a bit of clouds and another layer of earth just to detail it a little bit more. Here's the final image. Enjoy!
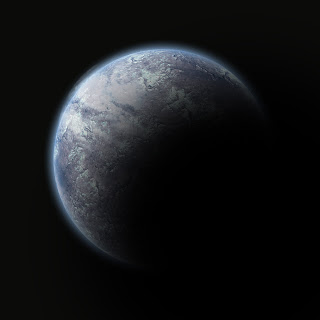
PLANET AWESOMNUS!
First of create a new document in Photoshop. I created one that is 3500 x 3500 pixel. The reason of using such high pixel is so that u can get a fine and nice detailed texture on the planet surface. Now...leave that page, find a nice picture for your earth surface (you can use pictures of rocky ground or earth or any texture you like).

this is the texture that i chose. If your texture file is too small, try to patch it up on a new 3500x3500 document to patch the textures together.
 After some patching and color burns, this is what i got. Go to Edit and select Define Pattern
Name if after ''The Texture of Planet Awesomnus'' ....you can name it whatever you want. Lets just call mine Planet Awesomnus for now.
OK..Now go back to the new document file, select Elliptical Marque Tool, hold down shift key and drag a uniform circle across the screen. Create a new layer and name it 'planet ground'- select paint bucket tool - go up to the tool bar and change from FOREGROUND to PATTERN. Select the pattern that you created earlier and fill up the marque area.

There you go.. This is what you will archieve. The image here seems flat so im going to add a filter to it. Go to Filter - Distort - Spherize it babeh! you will then get something as below

Notice the difference? Good..carry on..
Next, we're gonna work on the atmosphere of the planet. use your magic wand to marque the Black colored area, right click and select inverse. Turn off the earth layer and create a new one. Name the new layer as Atmosphere. Fill up the marque area with the color you want for your atmosphere. For this tutorial im going for a blue atmosphere for my planet. Below are the settings.

 You should be able to get something like this...
 Now...create a new layer and name it shadow. Place the layer on top of atmosphere. Now, again with the magic wand technique but this time set the Tolerance to 50...marque the circular area and fill it up with black color. You will then get something like this.
Alright, now you have a nice eclipse but thats not what you want rite? Select your shadows layer and move it lower to your bottom right if the sun direction is from the opposite angle. try to resize it holding down the shift key until u get the shadows coverage you want. Here is mine below.
 Last but not least...turn on your Planet Ground and place it in between your Atmosphere and Shadows layer. Then set it to screen. Wahlah..you're almost there!
 well, you can add in some of the details such as clouds or touch up the shadow layers. Play around with it and spend some time testing with multiple layers to create different atmosphere on the planet. i added in a bit of clouds and another layer of earth just to detail it a little bit more. Here's the final image. Enjoy!
PLANET AWESOMNUS!
Amazing Photoshop!
ReplyDelete